IoT Target
The targets are used to specify the target deployment of an IoT Gateway.
Every project contains a default-Target. For simple projects the default target
can be used directly to design the IoT Gateway.
For large IoT project it is recommended to use the default target for device template testing.
Create a Target
-
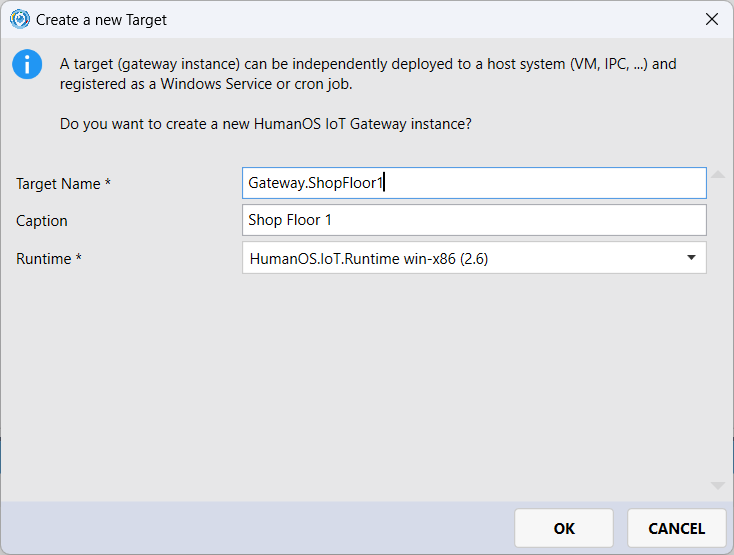
Create a new Target
- The target name can be used as a name of the gateway and windows service.
- The caption is the display name of the target.
- Select the runtime: Each target can have a different runtime, such as trial, linux, arm, etc.
-
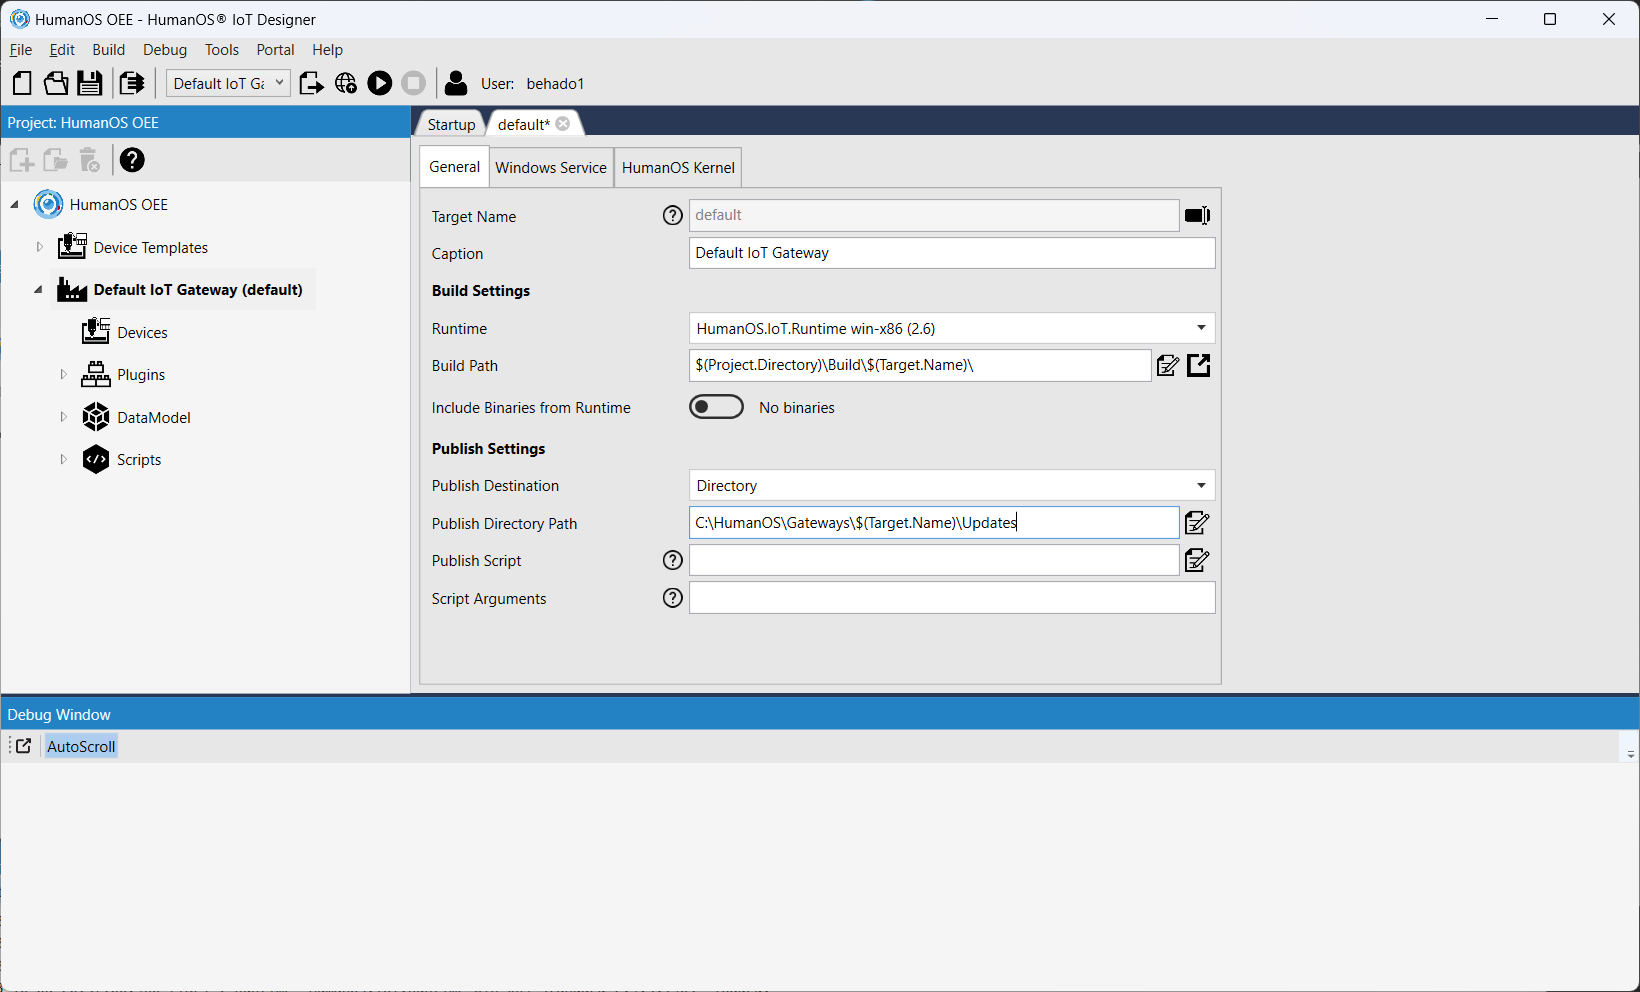
Double click on the target
- Build Settings
- Runtime
- Output path: folder of the target build
- Flag if the binaries of the installed runtime shall be copied to build folder
- Publish Settings
- Publish Destination: The publish type like
DirectoryorPlatform(ctProduction platform) - Publish directory path: path of the publish. Typically, the path points to a hosted gateway configuration folder. If using the
Updatessub folder, the new published changes are automatically updated when rebooting the gateway service.
- Publish Destination: The publish type like
-
Windows Service Settings (only for windows based runtimes)
- Name: Name of the service.
- Display Name
- Description
- Start Type:
Manual,Automatic,AutomaticDelayedorDisabled
NOTEIf several gateways are hosted on the same VM, make sure the service name is unique. It is recommended to use the variable
$(Target.Name)in the name of the service, e.g.HumanOS.IoT.Gateway.$(Target.Name). -
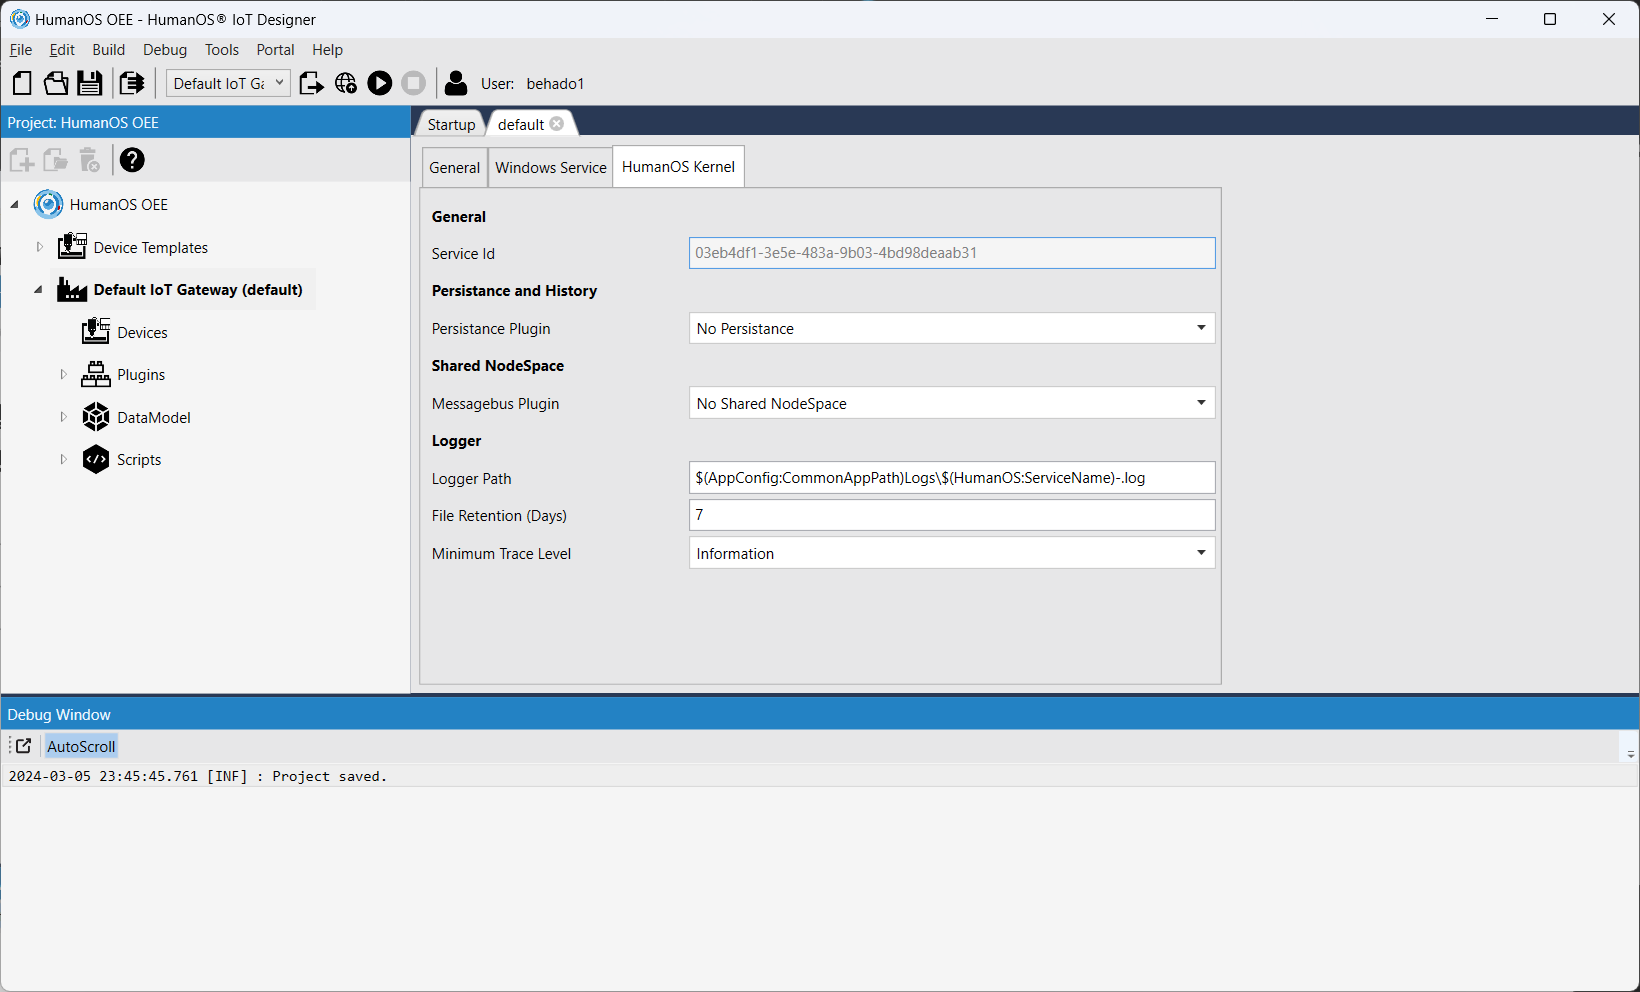
Gateway Kernel Settings
- Persistance Plugin to persist the node space of the gateway
- Connection string for SQL based persistance
- Shared NodeSpace Plugin for inter-gateway communication
- Broker Address for Shared NodeSpace Plugin
- Logger output path
- Logfile retention in days
- Minimum trace level. Default is "Information"
- Update Source and backup folder for Auto Update.
- Build Settings
Add New Devices to Target
-
Click on "Devices" in the desired target and click "Add New Content".
-
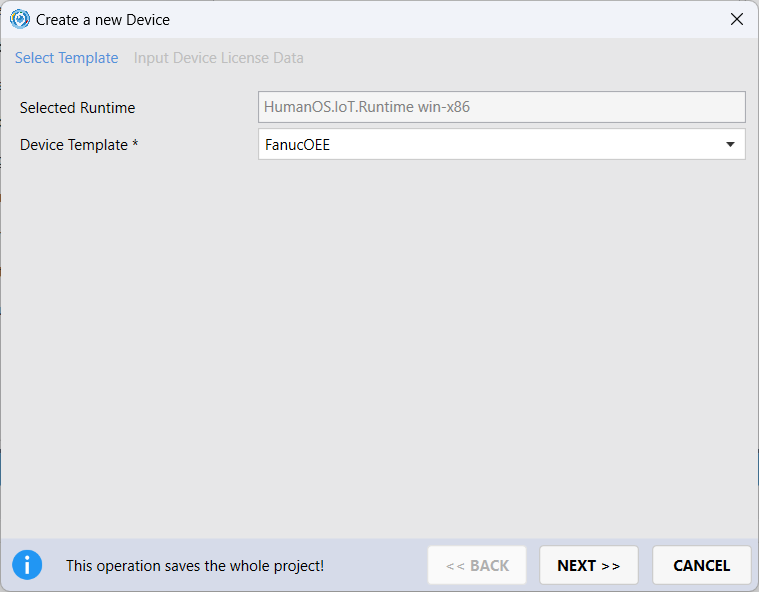
Select the device template
-
For Trial: Input the data of the IoT device. Most important is the connection address.
-
For Productive Systems: Creating a new device requires a HumanOS® Device License. The license is automatically created on the HumanOS® Portal.
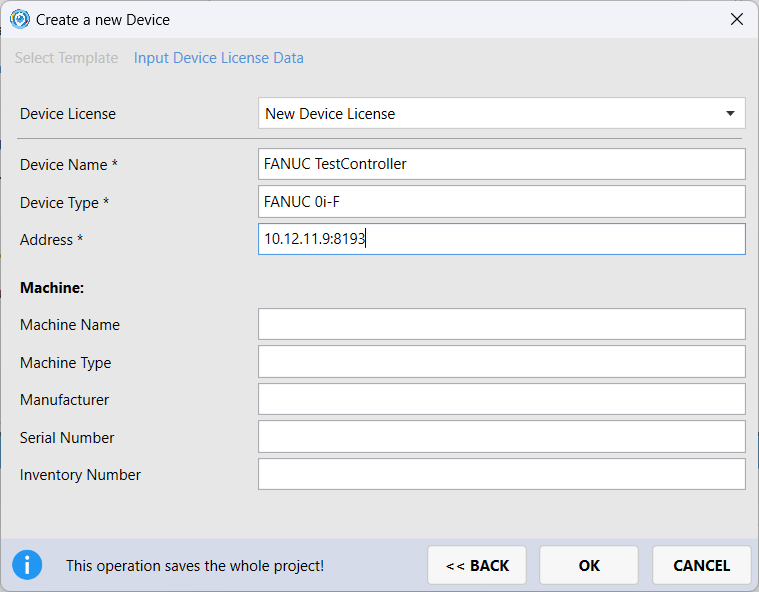
-
-
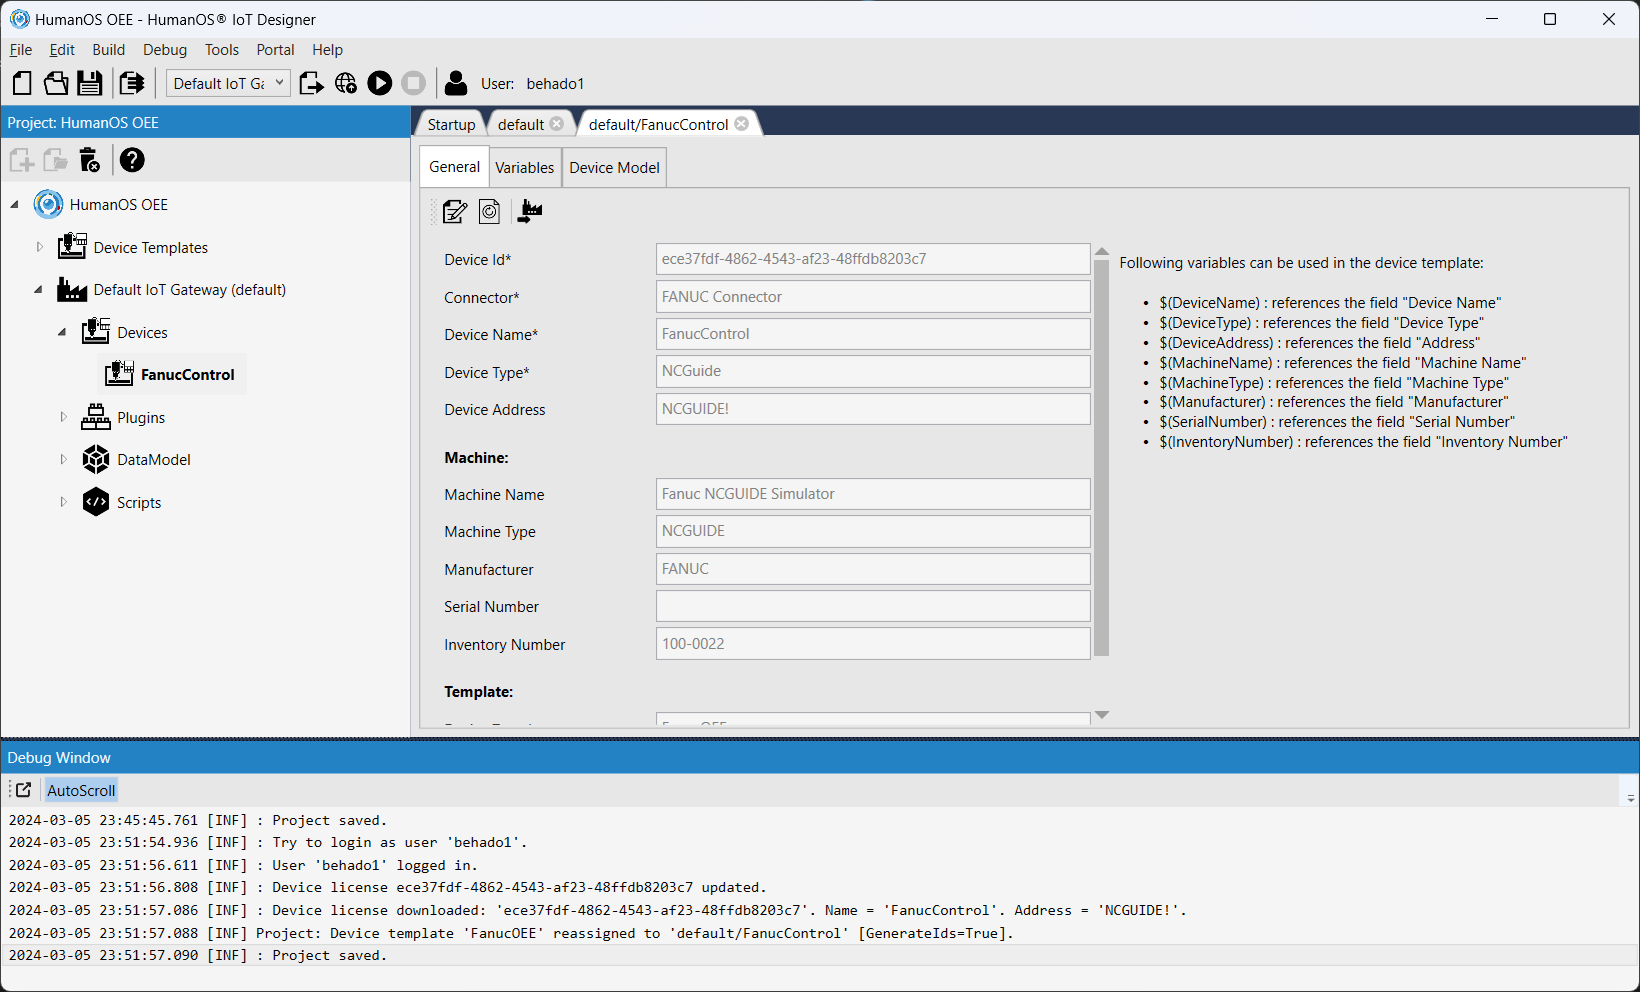
Double click on the device to change settings
-
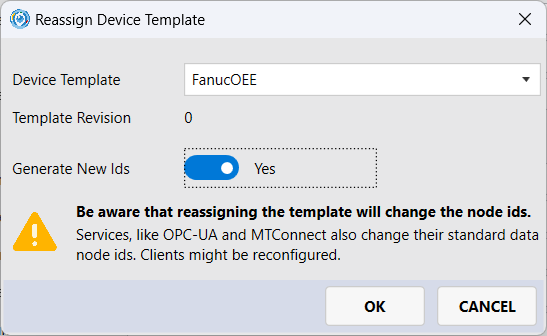
An other device template can be assigned to a device.
NOTEWhen selecting the flag "Generate New Ids", all node ids are changed. This will affect all clients rely on node ids, like OPC-UA clients.
Working with Variables
Built-In Device Variables
The concrete device can be parameterized with different variables:
- Device Name: name of the device connected by HumanOS®.
Variable
$(DeviceName) - Device Type: type of the device, e.g. FANUC 0i-F.
Variable
$(DeviceType) - Address: Connection address to the device.
Variable
$(DeviceAddress) - Machine Name: name of the production machine, plant or production chain.
Variable
$(MachineName) - Machine Type: type of production machine, e.g. milling center.
Variable
$(MachineType) - Manufacturer: name of the supplier or manufacturer of the production machine.
$(Manufacturer) - Serial Number: serial number of the production machine.
Variable
$(SerialNumber) - Inventory Number: the internal inventory number.
Variable
$(InventoryNumber)
Note: Use the variable names in the device template as placeholder for device or machine specific settings. For instance in a device data node:
opc-ua:NodeId = Root.$(MachineName).Feedrate
Customized Device Variables
On the register Variables other variables can be defined for the device.
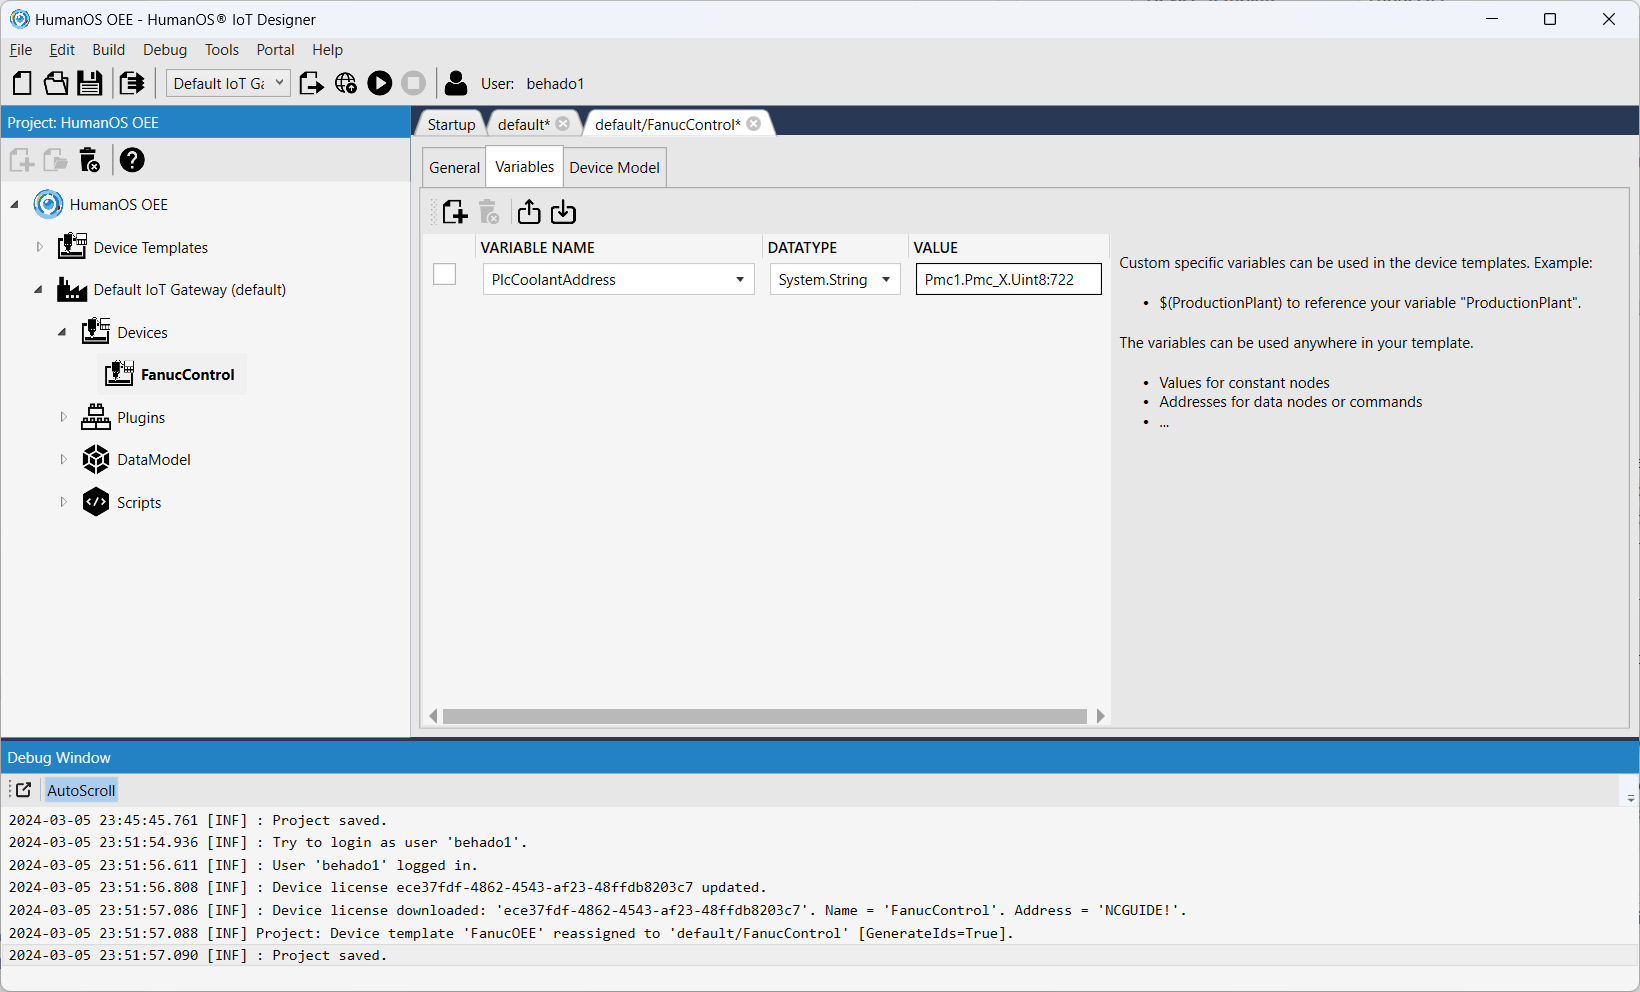
For instance, machines often have a bit for coolant on/off state. The address might be different from one machine to another machine due to different CNC versions.
Instead of having a template for each memory variation, use variables to reduce the number of templates.
Template Revision
Devices and device templates are compared to each other by the Revision property.
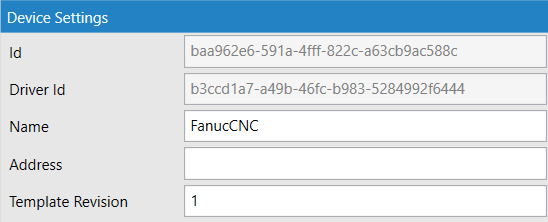
If the revision of a template is newer, a message will appear on the affected devices.

Reassigning templates to devices will also indicate which devices are older than the template revision.

The devices which do not correspond to the revision are also mentioned in the deploy log.

Revisioning on the template and the actual device is behold of the user and is not in any way automated. If this property is not specified, this behavior is not applied.